This guide walks you through the steps required to interact with an Agentforce Agent using the Headless Agent API via Postman. We’ll cover creating a Connected App, configuring your Agent, and testing the interaction through Postman.
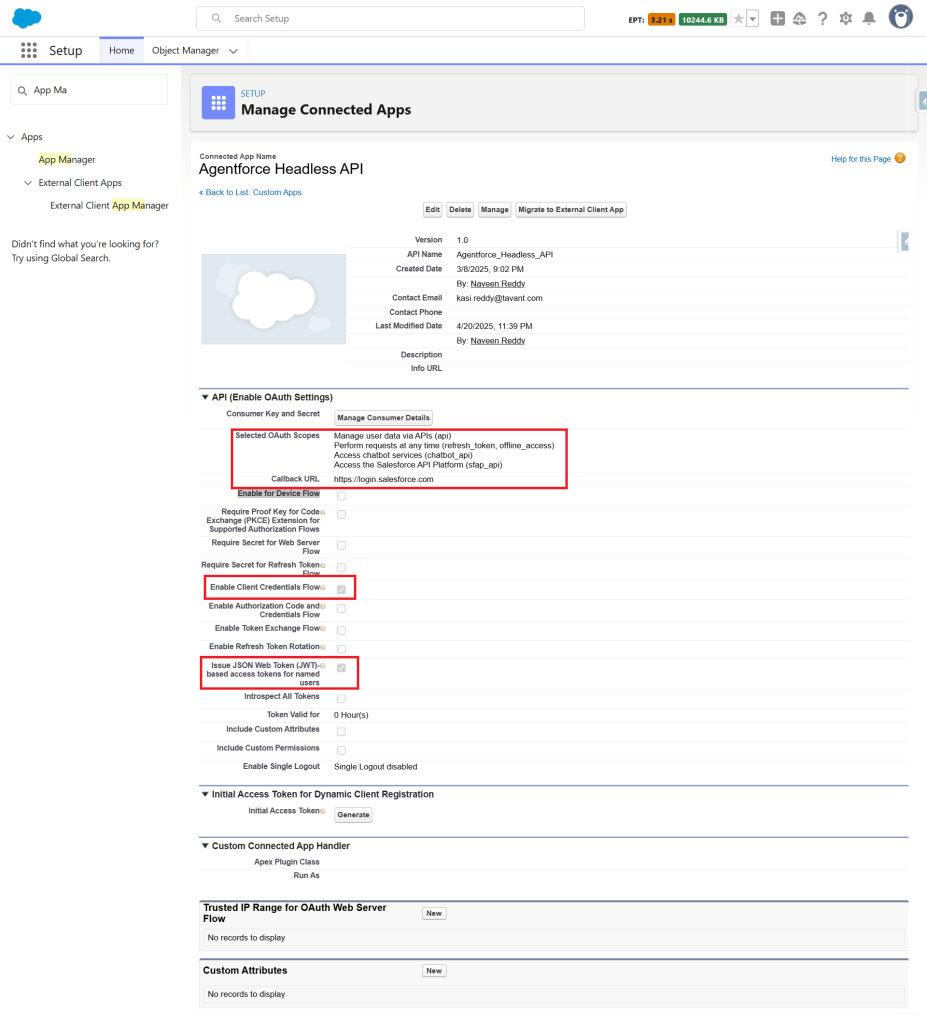
Step 1: Create a Connected App
Create a Connected App in your Salesforce org to obtain the necessary credentials for authenticating API requests. This app will enable secure access to your Salesforce data using the Agentforce Agent API.
Step 2: Create an Agent
Set up an Agentforce Agent tailored to your use case. You can follow this detailed guide to create an Agent:
Building a Predictive Model and Invoking it Using an Agent in Salesforce
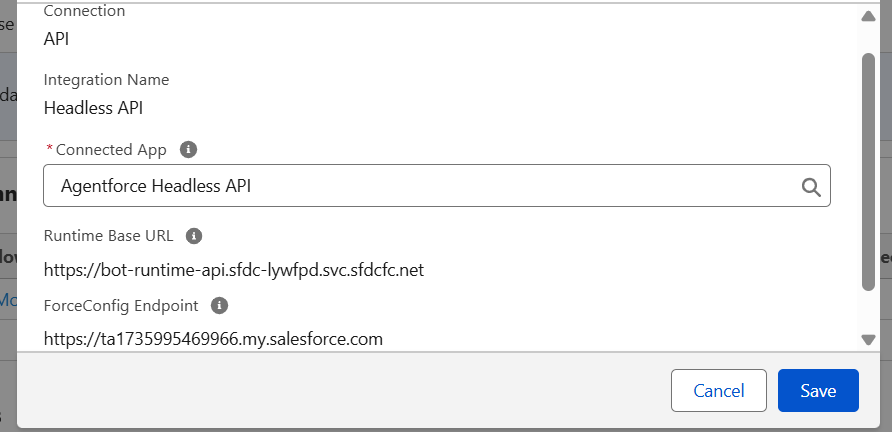
Add an API Connection to the Agent:
- Navigate to Agentforce Agents in your Salesforce org.
- Click on the desired Agent (e.g., “Lead Engagement Agent”).
- Go to the Connections tab.
- Click the Add button.
- Fill in the required details to establish a secure API connection.
Step 3: Set Up Postman to Connect with the Agent
Download the Postman Collection:
Download the official Postman collection for the Headless Agent API from the Salesforce Developers team:
Salesforce Agent API Collection on Postman
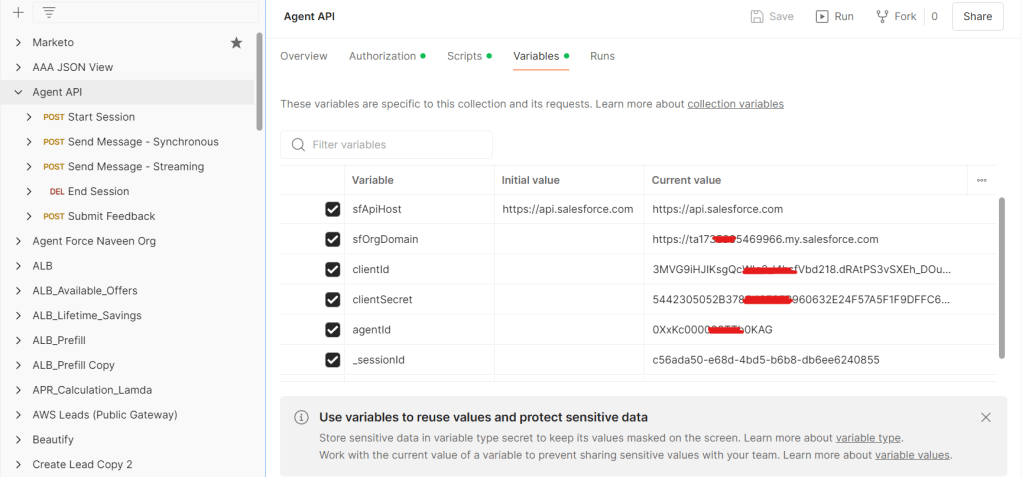
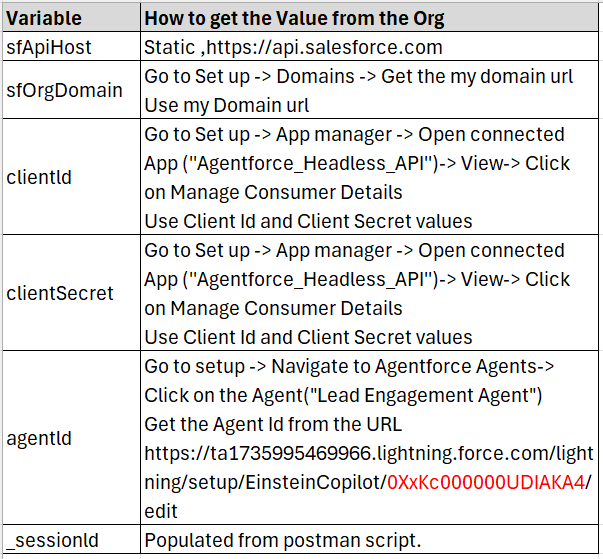
Configure Collection Variables:
Set the required collection variables such as client_id, client_secret, org_base_url, and agent_id.
- These variables are essential for authenticating and interacting with the API endpoints.
Step 4: Test the Integration with Postman
You’re all set to test the interaction!
- Use the OAuth 2.0 Client Credentials flow to authenticate and obtain an access token.
- Start a session with the Agent using the Start Session endpoint.
- Send a message to the Agent using the Send Message endpoint (Synchronous).
- Send a message to the Agent using the Send Message endpoint (with streaming).
- Finally, end the session using the End Session endpoint.


Leave a reply to Agent API Using LWC (Lightning Web Components) – SAGE CLOUD Cancel reply